


The quilt size (before quilting) is: 59-1/4" x 79-3/4"
 Yardage for centre portion:
You will need 3/4 yd. of 5 (five fabrics) (this includes extra fabric in case of any booboos and if you are like me you will need it ... trust me, I made a few mistakes in cutting and was glad to have the extra amount! If you are anxious about not having enough fabric, then buy 1 yd. of each fabric.)
Yardage for borders: (extra fabric has been included here)
For the inner and outer borders (light blue) you will need 1-3/4 yd.
For the middle border (rust) you will need 3/4 yd.
Cutting:
Of each of the 5 fabrics, cut 9 strips 2-1/2" wide x WOF (width of fabric)
For the light blue, cut 14 strips 3-1/2" wide x WOF - these will be used for the borders (you will be using 7 strips of this colour for the inner and outer border).
For the rust, cut 7 strips 2-1/2" wide x WOF - these will be used for the border
Sewing: Referring to Fig. 2, this is the order that the strips will be sewn together using a 1/4" seam allowance. Make 9 sections which will include all of these colours. A section will have 5 fabrics (one of each colour).
 Fig. 3 - For this tutorial, press open your seams. For any of you wanting to quilt-in-the-ditch once your top is made up, this method with the seams will not work for you. You will need to chose another quilting idea. You can press your seams to one side, but it gets complicated later when making up the blocks.
 Fig. 4 - Cut out 2-1/2" strips from each section. Can you see how masking tape is aiding me for cutting these strips? I had to put it there as too many booboos were happening. Also, when cutting the sections, the open seams are facing up. The section lies flat on my cutting board and it makes cutting easier.
 Fig. 5 - After cutting out the sections into 2-1/2" strips, leave 24 of the strips as is; the rest will need to be made into a tube. To make a tube, take the bottom of the strip and bring it to the top and sew those seams together.
 If you want a quicker method that eliminates sewing a tube for each 2-1/2" cut strip ...
Fig. 6 - Square off one end of the section, then bring the bottom to the top and sew those seams together. There you have a tube.
 Fig. 7 - Place your tube on the cutting board and cut 2-1/2" strips.
 Now, it is time for this part of the tutorial to finish. Besides, I have to go play with Miss Ashes. She has been begging for attention! :o)
 So, until next week when my tutorial will continue, have fun!
 Fig. 7 - Place your tube on the cutting board and cut 2-1/2" strips.
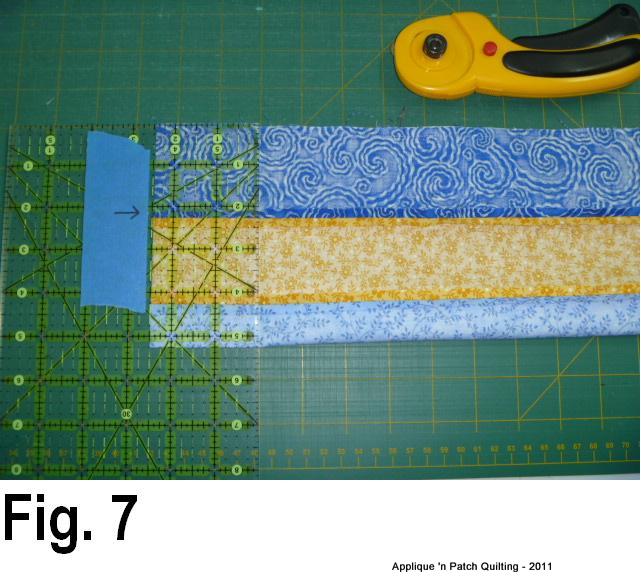 Now, it is time for this part of the tutorial to finish. Besides, I have to go play with Miss Ashes. She has been begging for attention! :o)
 So, until next week when my tutorial will continue, have fun!


